

What You'll Need:
A shirt, or other item of clothing
Freezer paper (I found this somewhat difficult to find. Check a few different grocery stores, it should be in with the Saran Wrap and Foil. I got a large roll for $2.99 at our local Meijer; Walmart didn't have it)
Fabric paint or spray paint (if you only plan to wear this shirt once, you can also use acrylic. I don't suggest putting it through the wash though, it won't look as nice when it comes out).
A paint brush
A palette
Xacto Knife (I used a box cutter and it worked fine, but I don't suggest scissors)
Iron
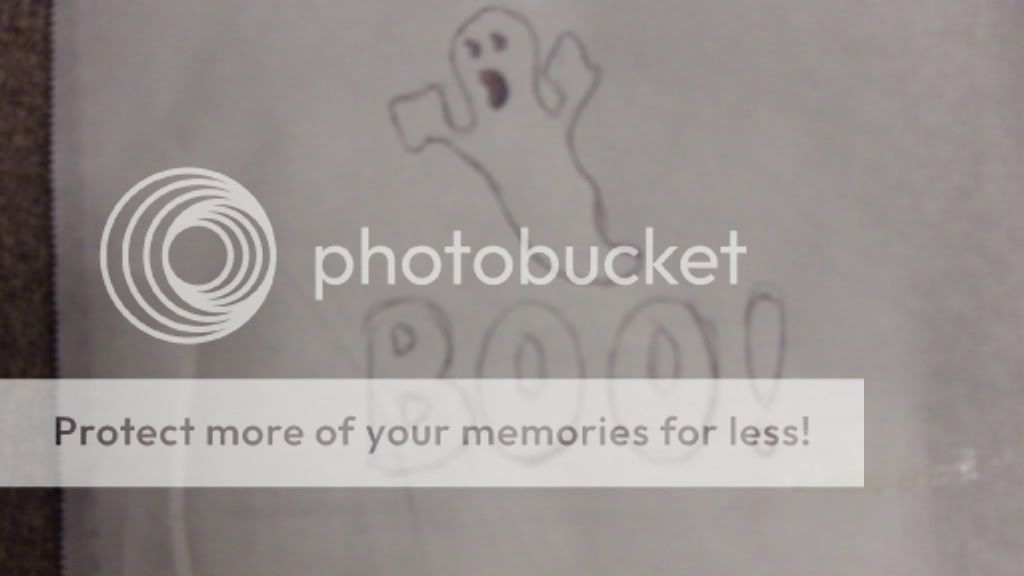
Let's get started! Get online and find yourself a design! Or if you're a real artist, draw it yourself. I wanted a ghost for this shirt, it's going to be Emma's Halloween shirt! So I got online, Googled "ghost" and found the perfect picture. I pasted it into Word and made it the actual size I want it on the shirt. I took the proper amount of Freezer Paper, and held it up to the monitor to trace. One side is shiny, the other is like paper, you'll want to draw on the paper side. Once I had my ghost, I added in the word "BOO" underneath. I'm never brave enough to freehand these things, so of course, I typed it into Word using the font I wanted, and traced it.

Now that you have that done, you need to cut it out. Use the Xacto knife and be as precise as you can.

You may want to keep these little middle parts if you've got any. I happened to be using a black shirt, and I had black paint, so I tossed these out, and I filled in the negative space with the black paint (you'll see that on the finished product).

Now that you've got your design cut out, it's time to iron it! The iron doesn't need to be very hot, I turned mine on and used it about 15 seconds later. Place the design shiny side down onto the shirt. Make sure it's positioned exactly how you want it. Press the iron on a corner of the design, and then gently tug at the freezer paper to see if it sticks to the shirt. If it doesn't, wait for your iron to heat up a little more, and adjust the heat setting accordingly. When ironing, press the iron down and gently wiggle it back and forth while using gentle pressure. You don't want to move the iron back and forth much, because it could tear or rip back your design.

Now it's time to paint! I chose a nice pearly set of fabric paints, so they have a metallic sheen to them. Once I had my ghost painted, I realized that the paint takes 4 hours to dry, and it was looking like I might need a second coat. You can use a hair dryer to speed up the process, but I chose to just be done with it (hair dryers + sleeping babies don't mix well). I got the paint as thick as I dared, and used my sponge brush to get a nice flat layer. It does this better than the brush, and won't leave streaks.


Once my ghost and letters were filled in, I used my plain black (non metallic) and a paint brush to draw on the eyes, mouth, and middle of the letters.

Leave it to dry flat for at least 4 hours, or overnight. You don't want to do the next step until it's 100% dry. Once it's completely dry, peel off your freezer paper. I had a little bit of a problem with mine sticking, so you may need to peel off little bits of paper that get stuck to the edges of the paint.

How cute is that?
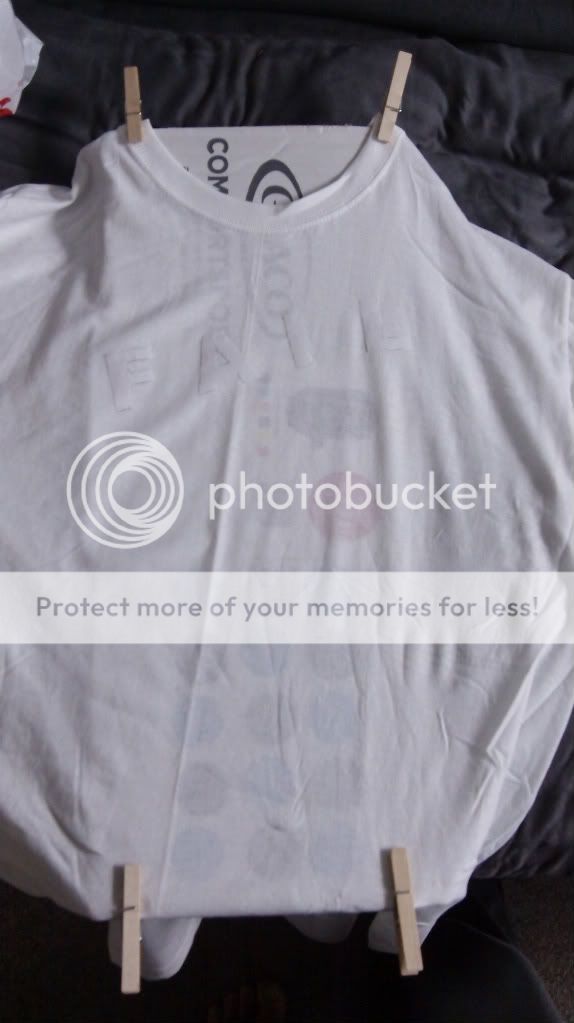
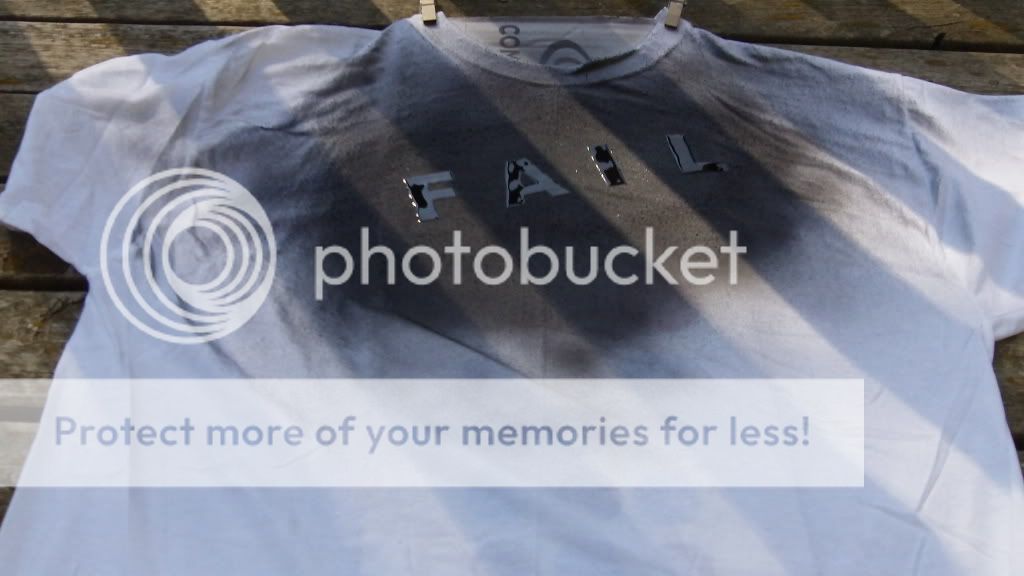
You can also do this inverted. I made Ben a shirt this way. We're both a fan of Failblog.org, and I thought this would be a funny idea for a shirt. I considered spelling "FAIL" wrong, to make it a true fail, but I wasn't sure people would get it, lol. I cut out my letters (you can use scissors for this, since you don't need the outer parts of the freezer paper, just the letters themselves). Iron them on, just like last time. Since I was spray painting this time, I needed my fabric to be really flat. After ironing, I pinned my shirt to a strip of cardboard to hold it in place. This will also prevent bleeding through.
I went outside to use my spray paint. I was planning to use silver, but it mysteriously disappeared, so I used black instead.
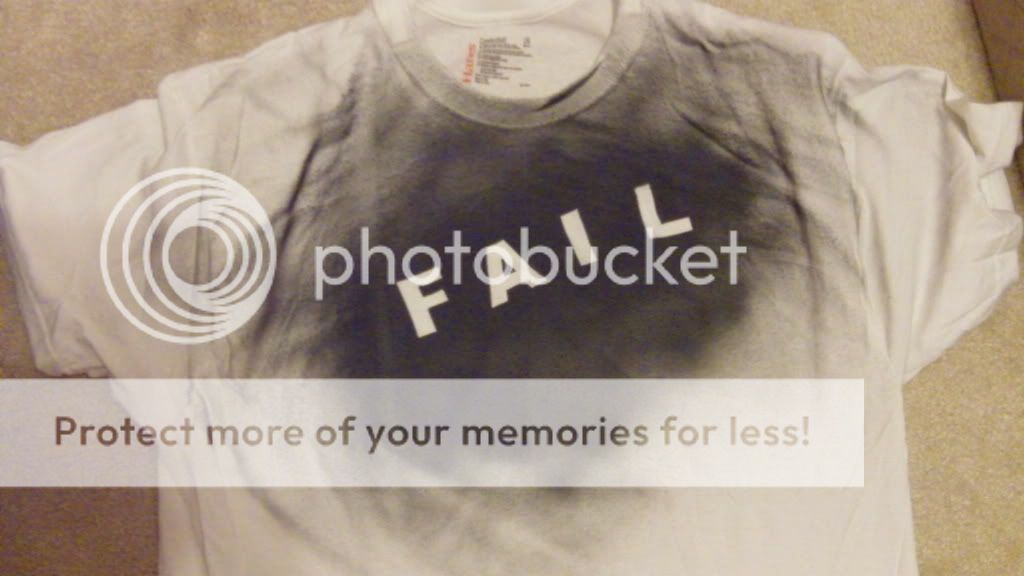
Leave it outside to dry to the touch (about 30 minutes) and then peel off the letters. You may want to let it dry for a few hours before washing it.
No comments:
Post a Comment