

Come like Crafty Mama on Facebook!
What You'll Need:
What You'll Need:
Eggs
Vinegar
Food coloring
Rubber cement
Vegetable oil
Start out by hard boiling your eggs. It's best to NOT use new eggs. Most times when you buy eggs from the store, they haven't been sitting on the shelf long. So make sure they sit in your fridge for about a week or so. If they're too new and you hard boil them, they won't peel very nicely.
Put your eggs in a pot and cover them with 1-2 inches of cool water. Put them on the stove on high.
Once your eggs have come to a boil, turn them off and let them sit for 15-20 minutes (it really doesn't matter too much, I accidentally left mine for about 40 minutes while I showered, and they turned out fine).
Fish your eggs out of the hot water and place them in a bath of cold water. You might need to switch it out once for more cold water.

Once your eggs have cooled, you need to prep them for dying.
Take your rubber cement and a paintbrush.

This is the fun part! Make all sorts of designs on your eggs with the rubber cement. I zig zagged it across the eggs, swirled it, did polka dots, ect. You could even write names! Get your designs done, and give them at least 30 minutes to dry.

You need to use HOT water for your food coloring, so it's best to boil it. Once your water has boiled, mix your water and vinegar. You need 1 tsp of vinegar for every cup. I poured myself 2 cups of hot water, added 2 tsp of vinegar, and then distributed it evenly into my 3 cups. You don't want to fill your cups too full, because they may over flow when you put your eggs in them.
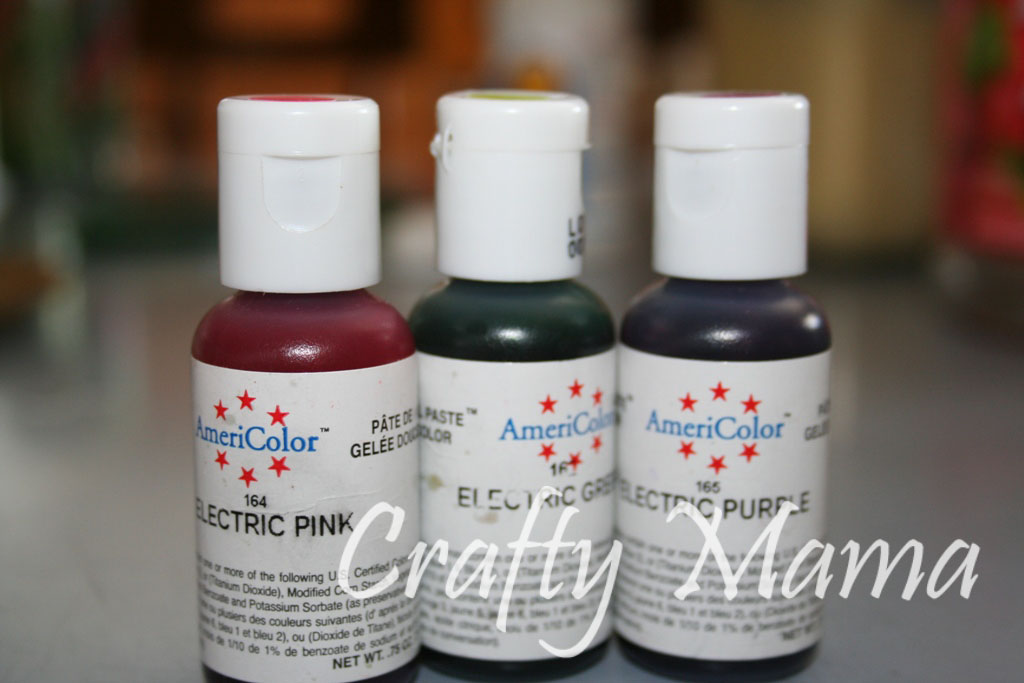
If you don't have the cool little color tablets that come with Easter egg kits, you can use plain food coloring. I used some leftover gel food coloring from Emma's birthday cake, electric pink, green, and purple.
Add enough food coloring to each cup to get a nice rich color.

Dip your eggs in your colors, checking on them every 10-15 seconds to see what color they are. When they're the color you want, pull them out with a spoon.

Lay them on your drying rack or paper towel. I used a cookie sheet with a cooling rack on top.


Once your eggs are mostly dry, wipe off the bottoms with a paper towel, and rub off the rubber cement. To get a shiny look to your eggs, rub them with vegetable oil.
To get the marble effect on your eggs, add about a tsp of vegetable oil to your colored water. When you dip your egg in, the vegetable oil will coat parts of the egg, and keep the color off them. The key here is to dip the egg in, and leave it there, don't check on it! I made that mistake with a couple of my first eggs, and they came out barely marbled. Let dry, and wipe clean with a paper towel.
This was such a fun project to do! I loved the effects on the eggs, and they turned out so CUTE! I actually think I'm going to do some more before Easter, maybe trying out some more effects. 


Would love for you to share this with us on "EGG recipe" day!
ReplyDeleteWe are hosting an "EGG DISH" recipe linky party caleld THIS WEEK'S CRAVINGS and would love for you to bring over this GREAT recipe!
http://momscrazycooking.blogspot.com/2011/04/this-weeks-cravings-linky-party-24-egg.html
These look great!
ReplyDeleteThese are so cool! I love the designs the glue added to the look! Thanks so much for sharing!
ReplyDeleteI host a weekly linky party on Tuesdays called Terrfic Under Ten. It's for projects made for $10 or less. I would love to have you link up sometime!
I'd never heard of using rubber cement with eggs, great idea!
ReplyDeleteWhat fun! I am planning to try next week. Never had a clue you could use rubber cement, veggie oil, etc. Thanks for breaking it down!
ReplyDeleteSuper cute idea !!! They turned out amazing !!!
ReplyDeleteYou can visit my blog here http://sailingwithbarefeet.blogspot.com/
These are so cute! I just made some super cute Deviled Egg Chicks! You should stop by and link this up! I am now a follower! =)
ReplyDeleteWhat a unique idea.
ReplyDeleteSo cute!
ReplyDeleteThese are so cool. What a great idea!
ReplyDeletevery cute idea! I love the rubber cement idea. Cute blog:)
ReplyDeleteCute idea! Thanks for linking Flaunt it Friday! :)
ReplyDeleteVery beautiful! I have never used Rubber Cement to do the negative - BRILLIANT!
ReplyDeleteThanks for linking up to Making It With Allie! I can't wait to see what you have for next week!
AllieMakes.Blogspot.com
So pretty!
ReplyDeleteI love this, we make some but use textile paint for a more polished forms, they dry quickly! ill try your way next time! thanks for the detailed technique.
ReplyDeleteKaty - What a fun technique - your eggs look fantastic - love the colors! I have featured these today. Thanks so much for stopping by and linking up to the Sunday Showcase - I greatly appreciate it. Hope you have a wonderful holiday! ~ Stephanie Lynn
ReplyDeleteI'm a new follower and thought these were too cute to pass up. I am sharing these on my blog with a link back to you!! Thanks for sharing.
ReplyDeleteI absolutely LOVE this idea...I'm going to have the kiddos do this at our Easter dinner party tomorrow, so thank you! I've featured you on my post 'eggs, REAL eggs! (a tribute to the real egg on Easter):
ReplyDeletehttp://jelly-bean-dream.blogspot.com/2011/04/eggs-real-eggs.html
Happy Easter :)
~Jill
Beautiful Easter Eggs. I can use them for my easter party. Thanks for sharing.
ReplyDelete