

I finally finished the little wooden jewelry box! I actually got the painting done a couple weeks ago, but when I taped off the drawers, paint leaked under the tape, and there was a lot of touch up work to be done. So I finally got it done, and I got pictures taken.

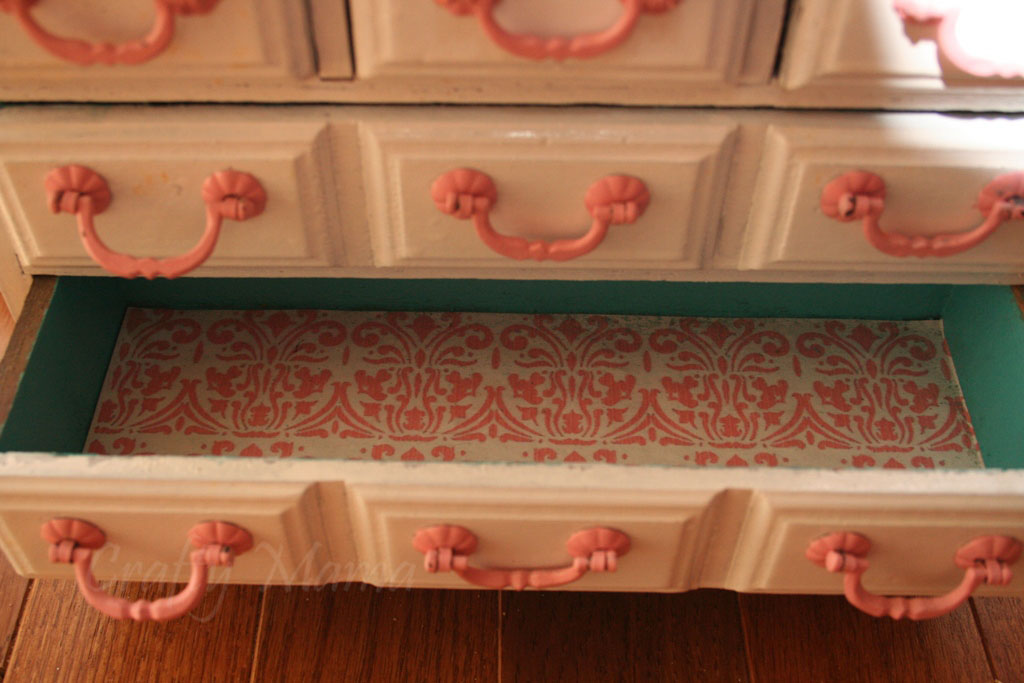
First I had to peel out the ugly velvet from the inside of the drawers. It was glued in with some crazy industrial glue, and was horrible to get out. I ended up chiseling away at it with a knife, and then soaking the drawers in water, and scraping the rest off. Once the drawers were dry, I painted the insides a pretty turquoise color.

I roughed up the outside with some sand paper, then wiped it down with a damp cloth. I taped off the drawers so that only the face would get painted. I stuffed the inside with balled up paper so it didn't get sprayed.
The handles came off pretty easily. To paint the handles, I stuck them through a piece of card stock, then gave them 3 coats of spray paint. They had tabs that go through the drawer, so it was easy to remove them and mount them to paint.

I didn't have any scrapbook paper I liked for this project. So I got on Google, found a design I liked, altered it, changed colors, ect, and printed it. Then I cut out pieces to fit the top of the dresser and inside the drawers, and Mod Podged them in place! I love the look of it. I can't believe that I never thought about printing designs to Mod Podge. Duh!


Isn't it amazing what a little paint will do?
ReplyDeletePaint and paper makes things so pretty! Good job!
ReplyDeleteSo cute! And good call with the printing designs...I love that you were able to make customized paper that way!
ReplyDeleteStephanie
http://creationsalamode.blogspot.com