Tuesday, September 14, 2010

Ribbon necklace.

I've been seeing these necklaces all over Etsy (for $20 or more!), and thought I'd try to make my own. I mean, really, I'm not paying that kind of cash for something I can make for free! I just so happened to have ribbon, pearls, and thread on hand. So the grand total is.. $0!
What you'll need:
Ribbon (I used grosgrain, I suggest using satin or sheer, I was just using what was on hand)
Beads or pearls
Needle and thread in coordinating colors
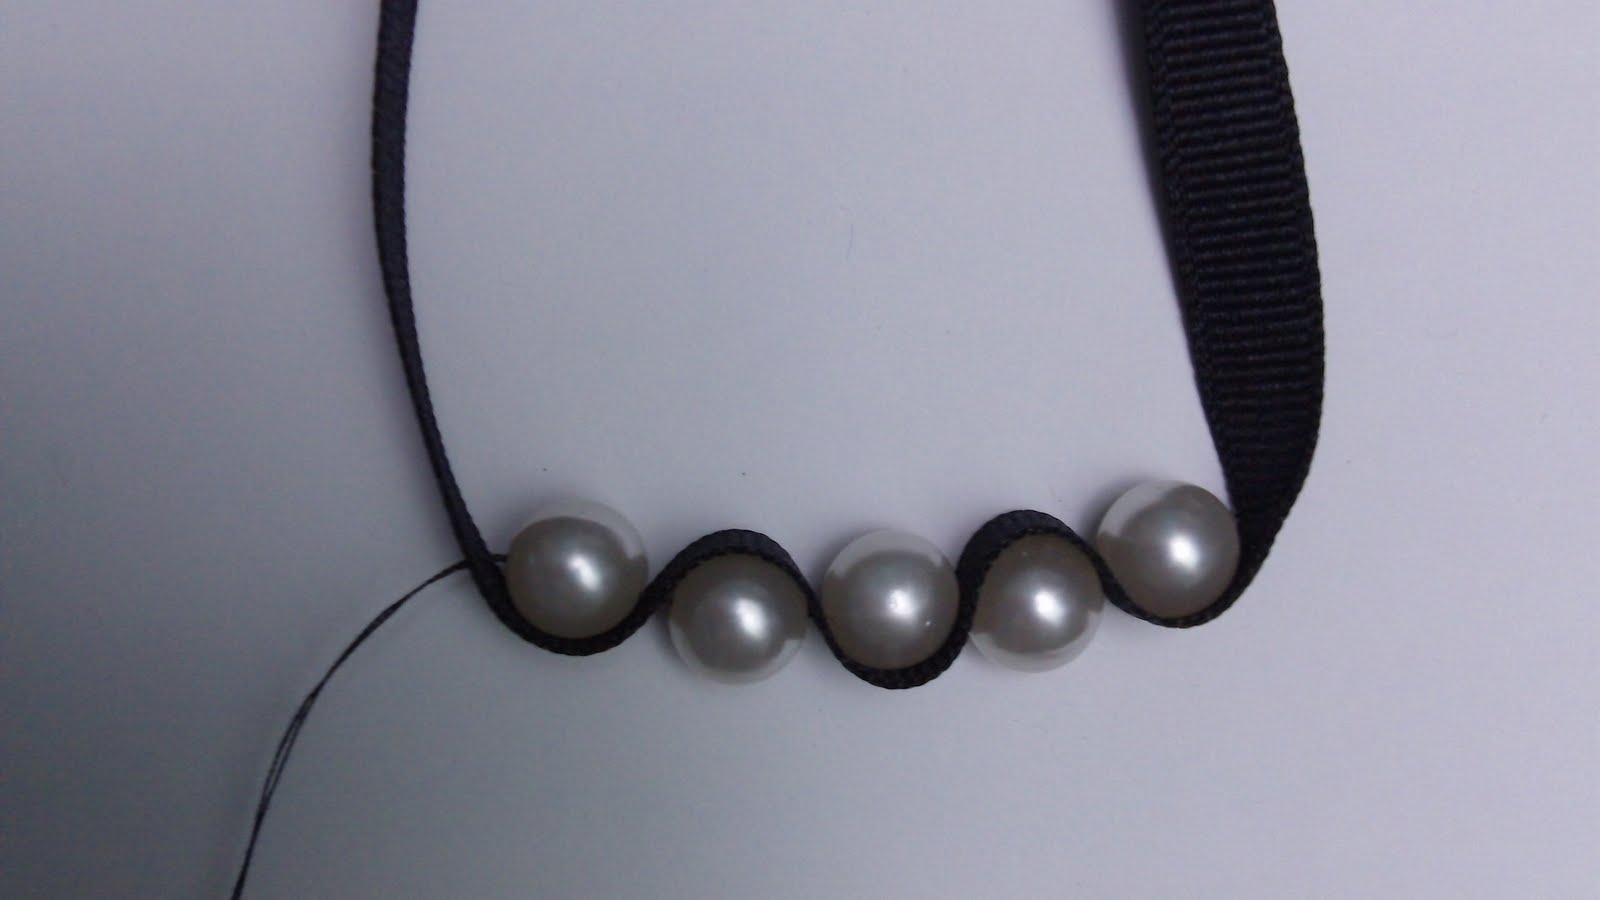
Ready to get started? Take your ribbon and unwind it partially from the spool. You don't want to do any cutting yet, because you're going to want to measure it once you've got your beads on. About 8-12 inches into the ribbon, secure your thread by sewing back and forth a few times. Make sure your thread is VERY secure, the last thing you want is for your necklace to break and have pearls flying everywhere. String your first pearl onto the thread, and sew back through the ribbon. 
I went about 1 cm between stitches, because that was just enough to wrap around my pearl. It'll depend on how large your beads are though. 
Once you've got all your beads on, pull the thread tight and secure your thread again by sewing back and forth a few times. It should look something like this when you're done. 
Now bring the end of the ribbon around your neck, decide how long you want it, and where you want it to tie, and cut it. Make sure to leave enough room to tie a bow with it! Hit the ends with a lighter, and you're done.
I also decided to make one using the sheer pink ribbon I have.
ETA, this would also make an adorable bracelet! I might just have to make one!

Sassy Chic Apron

My lovely friend Brittany, modeling the apron!
So I was thinking to myself the other day, I must have this angelic, well behaved child in order to get so many craft projects done during the day.
Yup, must be well behaved..
Okay, maybe not well behaved, but at least she keeps herself occupied, right?
That's not where the flip flop goes, Emma.
So on to the apron! I've seen so many cute aprons out there, some that were supposed to look like dresses, some that were frilly. I had an idea in my mind of what I wanted it to look like, so I started off with a quick sketch.
Lay your fabric out flat, print side down, sketch your pattern onto the fabric, and cut it out. I had to hold my fabric up to my body a few times to get the length right, but in the end, it was pretty spot on for what I wanted it to be.
For the neck straps, I cut mine the length of the bolt of fabric, and then in half. This gave me two straps the same length. Keep in mind when cutting your straps, you need to make the fabric strips twice as wide as you want the straps.
For the waist strap, I cut two strips the same width and sewed them together to be twice as long. 
For the ruffle, I did the same as with the waist, but planned to trim it once I figured out how long I needed it. 
There's two different way to sew straps, and I tried both to see which was easier. For the neck straps, I tried sewing it inside out, and turning it right side in. Top stitch, and done. This took a long time to do.
The next thing I tried was sewing it exactly how you'll see it, but flipping the edges in, and sewing it. This was MUCH easier and faster. Plus, when you do it that way, half of your top stitch is already done.
The ruffle doesn't need to be two sided like the straps do, because you'll only ever see the front of it. So with this, I just hemmed one side of it. On the other side, I did a loose stitch, and pulled the thread to make it scrunch. You can find more details on how to do that here.
Give your apron a nice hem along the sides, and then sew the straps on. 
I sewed my neck straps at a slight angle since that's how they'll be tied. If you don't do this, the front of your apron will pucker out once you tie it around your neck.
Sew the ruffle on, with the unhemmed edge in the back. 
Snip any last pieces of trailing thread, and you're done!

Sunday, September 12, 2010

I've been featured!

I was SO excited to find out that I've been featured on a couple blogs!
First off, I needed a model for my awesome Sassy Apron that I sewed up the other night! (Tutuorial to come) I tried it on, and over my swollen preggo bump, it just didn't look very.. sassy. So I gave it to my friend, Brittany at Mommy's Corner to model for me! She did a wonderful job, it looks so cute on her petite little figure! And guess what, she decided to showcase me! How sweet of her. So go check out her blog!

Also, I've been doing everything I can to get my blog name out there. I've been submitting my tutorials to all sorts of blog hops and link parties, and it paid off! I was happy to discover that Tatertots and Jello featured me! Now, I'm feeling pretty dang accomplished here, because there were 400-some projects submitted this week! :o And she chose one of mine to feature. How cool is that. So go check her out, too. She's always got some awesome projects she's posting about. Happy blogging!

Diaper Pod Giveaway!

My sister has an Etsy shop, Two Little Monkies, and she's doing a give away! 
She's giving away this GREAT diaper pod, how cute is that? There's instructions on how to enter in this post.
I love my diaper pod! It keeps my diapers and wipes all in one spot. If I need to grab them for a quick bathroom run, there's no digging to do. It's all right there! I'll be getting another one for this next baby to come. :)

Saturday, September 11, 2010

Caramel Apple Salad

This is a super simple, delicious fall salad! It only take a couple minutes to whip up, and is always a hit at parties.

What you'll need:
Apples (about 6)
A Tub of cool whip
A package of butterscotch pudding mix
Dry roasted peanuts
Mini marshmallows
Caramel ice cream topping

For apples, I just used what was in the house, which was a couple Ida Reds and 4 Macintosh. It's really yummy if you use some sweet and tart (like granny smith). 
Dice your apples, leaving the skins on. If you're worried about browning, throw your diced apples in a bowl of water with a squeeze of lemon juice in it.
Using a whisk, whip your cool whip with your pudding mix. Add it to your diced apples and mix until coated.
Toss in some peanuts and marshmallows (as many as you like!) and mix in.
Drizzle your caramel on top, and you're done! How easy was that?!