Showing posts with label Crafts for Mom. Show all posts

Tuesday, August 2, 2011

DIY Lightscoop Tutorial

In a quest to better my photography skills, I came across a knifty little item on Elizabeth Halford's blog. It’s called a Light Scoop. After reading her posts about it, and seeing the before and after pictures, I knew I had to have one. I experimented with holding something reflective in front of my flash (a piece of cardboard covered in foil) but I couldn’t get it to stay in one spot while focusing on what I was photographing. So I google searched how to make a Light Scoop, and what do ya know, I found a tutorial! This is a great step by step tutorial on how to make a light scoop. To try it out, I just used cardstock (2 layers thick), some tape, and my handy dandy foil covered cardboard. I’m really hoping to make a more sturdy one at some point (you know, with a real mirror), but for now, this works. I can’t believe the difference it makes! Here’s some comparison pictures. My kitchen has HORRIBLE lighting, so I used it as an example. (P.s. I’ll get a tutorial up on how to cold brew coffee soon, it’s brewing right now!). 


In my poorly lit kitchen, ISO jacked way up, no flash.


With flash.


With the lightscoop.


Can you believe the difference? It looks as though I just knocked down a wall and let some light into my kitchen! I can’t believe how natural it looks. I think every photographer needs one of these. 


With the little bit that I’ve experimented with photography, my number one problem is lighting. My house just doesn’t have enough windows (or else it’s those gosh darned trees that surround all my windows!) and I always have horrible shadows and poor lighting. I can’t wait to see how much of a difference this will make with all the photos I take in the future. Here’s the tutorial I used, with a template for a Canon camera. 
Here's some more comparison pictures!
My crazy messy crafting desk, taken at nighttime in low light.

Also taken in low light at nighttime.

Saturday, July 23, 2011

More sparkle toes!

I was looking through some old pictures of Emma, and I found lots of pictures of our pretty painted toes! I just though I'd share on here what cute possibilities there are for Sparkle Toes.

Such cute pudgy baby toes!
There's no place like home, there's no place like home..

Wednesday, July 13, 2011

Sparkle Toes!

I can't remember where I found this tip, but I love doing my toes like this! It's incredibly easy.
Choose your nail polish color and glitter color. They should be close to the same color (I've never tried contrasting colors, but who knows how it could turn out?)
Paint a base coat on your nail and wait for it to dry.
Set up a work station. You'll need either a paper plate or a sheet of paper. 
Place your foot on your work station.
One at a time, paint your nail, and sprinkle LOTS of glitter on it. Make sure to get every corner!
Pat down the glitter with your finger so it lays flat and sticks to the nail.
When all your nails are done, brush off excess glitter from your skin.
Pour excess glitter back into the container.
It's a little bit messier than a normal manicure/pedicure, but I love the results! So sparkly for summer!

Wednesday, June 1, 2011

Earring holder

I originally found this idea over at Trey and Lucy a while ago. It's so cute! I made an earring holder for both me and my daughter, I love the way hers turned out!

What you need:
An old picture frame
Lace
Rhinestones, ribbon, bows, ect.
Hot glue gun

Take the glass out of your picture frame. 
Cut your lace to be slightly larger than the frame.
Hot glue the lace to the back, stretching it tight.
Decorate as you see fit!
For the back, I took a piece of cardboard and folded it into an "L" shape. I hot glued the top of the "L" to the back of my frame to make a support leg.
Isn't it adorable! Perfect for my little girl's pink and turquoise room!

Thursday, March 24, 2011

Kindle Case

First of all, I finally made myself a Facebook page for my blog! Go ahead and check it out, I'd love it if you "liked" my page! I'll be posting links to my blog whenever I update it. I'm also likely to post anything creative that I come across that I want to share. So get on over there!

Now, on to my most recent project!
I saw this great Kindle Case over at Sohl Design. I gota admit though, I didn't even look at her tutorial, I just winged it. But I saw it, and I had to make it! She gave me all the inspiration I needed!

Choose two coordinating fabrics.
From each fabric, cut out a long rectangular piece measuring 7 by 20 inches. You can leave your ends squared, round them off, or taper them. I chose to taper mine. 
Place your fabrics pattern side in, and sew around the edges. Leave one end open.
Flip it right side out. 
Fold the edges of your open side in, and sew a top stitch. Sew a top stitch along the other end also. This would be a good time to iron it.
Choose which side you want showing on the outside. I chose to have my black fabric on the outside. Fold it so your outer fabric is on the inside. Sew your side edges.
Turn your case right side out. 
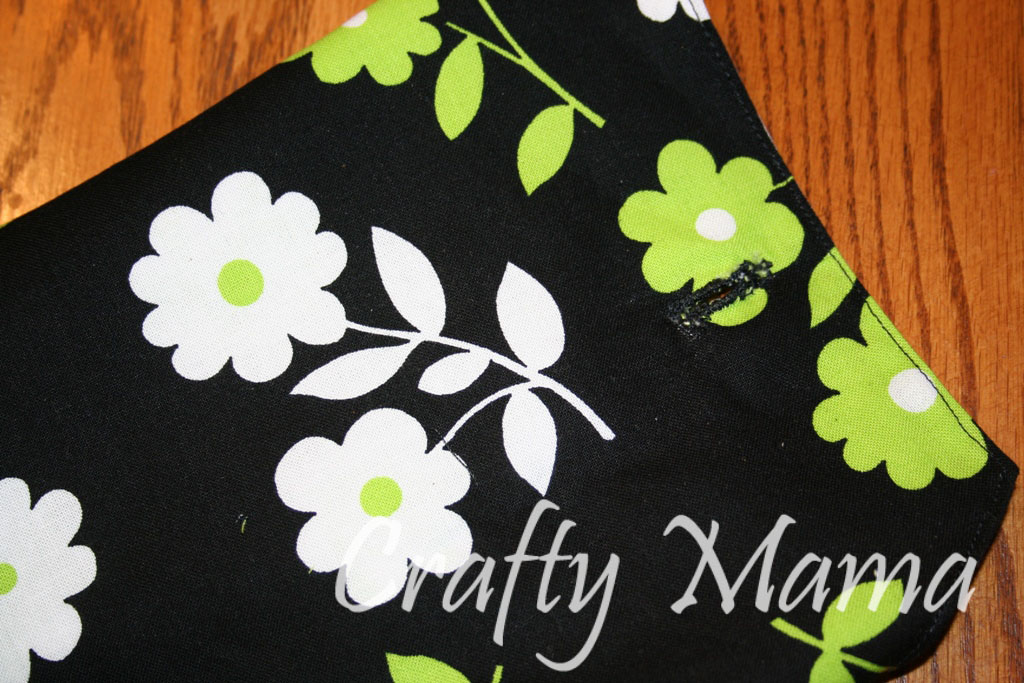
Sew on a button and make a button hole. If you're like me, and too lazy to learn how to use the button hole setting on your machine, then just use a really tight zig zag stitch for your button hole. It worked pretty well for me.


Monday, February 28, 2011

Camera strap cover

I meant to do a tutorial for this. I took all the pictures as I made it, but somehow lost track of the time and never ended up posting it! Now I have no idea where my measurements are, or what steps I did to get the final product. So you'll just have to settle with some pictures, sorry!
I was inspired by the gorgeous camera strap covers over at the Polkadot Bungalow.


Sunday, January 2, 2011

Pillow ensemble

I posted the pillows I made a while back. My parents have finally finished their bedroom remodel (for the most part), and I wanted to share the pictures! We're still thinking about making a bolster pillow, we'll see where that goes. My mom and dad made the headboard, and re-covered the chest at the end of the bed to match. My mom also made the pillows in the back (with the stripes). I think everything came together great! Here are the pillows I made, and a couple extras of the remodel.

Sunday, December 19, 2010

Upcycled Cowl Neck Scarf

I saw this post at Diary of a Crafty Lady last week, and thought that I HAD to make it. It's so simple! Last night I finally got around to digging out an old sweater, and went to work. It barely look any time at all. And isn't it cute?
I started out by finding the best place take the fabric from. It worked out perfectly (buttons and all) to take it from around the waist. 
I cut a slit up to where the buttons were, so I had one long piece of sweater material. Then I folded it in half lengthwise. Turning it button side in, I sewed the cut edge together, so I had a long tube. Then I turned it button side out. 
Once I figured out how the buttons were going to connect, I had to snip them off and sew them on the other side, and cut new button holes. 
Here's the finished product!
You gota love how the pea coat makes way for my gigantically 35 week pregnant tummy! (I'm not normally this wide).

Monday, November 22, 2010

Nursing Cover

This ended up being such a simple project, and a pretty cheap one too! It helped that I won a giveaway at Somewhat Simple, and got $50 worth of free fabric from Ribbon Retreat! I had an old nursing cover laying around that was pretty beaten up, so I just took the boning and D rings out of that. This project didn't cost me a dime!

What You'll Need:
3/4 yard of fabric
Boning (about 12 inches)
2 "D" rings
Sewing machine and thread

Cut your fabric into 3 pieces:
23 x 31 inches
3 x 25 inches
3 x 4 inches
Take your largest piece of fabric and hem 3 sides of it (the bottom and sides of the nursing cover). I double folded all my edges to keep it from fraying. 
For the fourth side, make a pocket for your boning. Take the top edge of your fabric and fold it down about an inch (again, I double folded it). Sew along the edge.
Insert your boning into the pocket, and make sure it's centered. Sew on both sides of the boning to keep it from moving around.
Take your 3 x 4 inch strip of fabric and hem the two sides in like this. No need to double fold here.
Insert the fabric through the "D" rings and fold it over, like this.
Fold down the bottom edges, and sew onto the cover. If you're right handed, you'll probably want it on your right side (left if you're looking at the cover). I sewed 2 lines to make sure it's secure.
Take your last strip of fabric (3 x 25) and fold it in half, pattern side in. Sew along the edge, and then flip it right side out. 
Sew a top stitch, and close in one end.
Take the other end, fold it over, and sew it on the left side of the cover (right side, if you're looking at the cover). I did two lines of stitching here, too, to make sure it's secure.
That's it! How simple was that. And so much cheaper than buying a nursing cover! Add ribbon or embellishments to make it cute and stylish.