Showing posts with label Holiday. Show all posts

Sunday, June 19, 2011

Frozen pumpkin mousse pie

I know this is out of season, but it's my hubby's favorite, and this weekend is Father's Day! So he's getting something tasty.
I was planning on doing my Pumpkin Mousse, but decided to put a summery spin on it, and make it into a frozen pie!

What you'll Need:
1 3/4 cups Gingersnap crumbs
3 tbsp Butter (melted)

15 oz. Can of Plain Pumpkin (if you use pumpkin pie mix, just leave out the sugar and spices from this recipe)
8 oz. Cream Cheese
1/4 cup Sugar OR 4 No Calorie Sweetener Packets
1 pkg Instant Vanilla Pudding mix
1 Tbsp Pumpkin Pie Spice
8 oz. Tub Cool Whip

Throw your gingersnap crumbs and melted butter in your food processor and pulse until combined.
Press the crumbs into a 10 inch. pie pan and bake at 350 for 8 minutes.
Add your pumpkin, cream cheese, sugar, pudding mix, and spices into your cleaned food processor.
Mix for about 30 seconds, scrape down the sides, and mix again for another 30 seconds.
Fold in the cool whip, and add the mixture to your cooled pie crust. 
Freeze for at least 4 hours, or over night. Garnish however you want, and enjoy!

Thursday, June 16, 2011

Flag cake

I got the idea for this flag cake a few weeks ago. My inspiration came from here and here. I figured I would take the individually baked layer effect from Whisk Kid and the Vertical layers from I Am Baker, and combine it to make a flag! And of course, this morning I found out that I Am Baker already did it! I had no idea before I got the idea for this cake, I kind of thought it was unique! I just saw it online this morning. It was featured at I heart Naptime. Lol, figures. But I decided to make it anyway!

I used the white cake recipe from Epicurious, and made a 1 1/2 times the recipe. Here's the adjusted recipe:
3 cups of AP flour
3 tsp. Baking Powder
3/8 tsp. Salt
18 Tbsp. butter (2 1/4 sticks)
2 1/4 cups Sugar
3 tsp. Vanilla
9 egg whites
1 1/8 cups Milk
Make your cake according to the instructions (if you're using box mix, I would make 2 full boxes).
Take about 2 cups of cake mix and put it in a separate bowl. Dye it blue. This takes quite a bit of food coloring.
Dye the rest of the batter red. This takes a TON of food coloring. I used an entire tube of red gel color for this, and it still wasn't as red as I wanted it.
Mix white sprinkles into the blue batter. I used some of these.
Since I didn't have that many of the snow flakes, I mixed in some of these little white sprinkles, too. (Note: the sprinkles didn't seem to show like I wanted them to, but it's still worth a try, if you can find some you think might show through!)
Trace your cake pan onto parchment or wax paper 8 times, and cut out the circles. 
Take one of the circles and lay it in the bottom of your pan. Butter or spray your pan with pan spray. Put all of your blue batter into one cake pan.
Bake your blue batter for 20-25 minutes, or until a toothpick inserted comes out clean.
To flip the cake out of the pan:
While the cake is still hot, spray a piece of wax or parchment paper and stick it on top of the cake. 
Flop the cake upside down and place it on a flat surface to cool. Don't forget to peel off the parchment paper that was on the bottom!
Now take your red batter and divide it between 7 bowls that are all the same size. By doing this, you're ensuring that each red layer will be the same thickness.
Spoon the batter into your cake pans. I only had 2 round cake pans (8 inch), so I had to bake in 4 cycles. 
Once your layers are cool, start frosting. For the frosting, I used this recipe. I used a double batch.
Put one of your red layers down first, and spread a thick layer of frosting on it. Do this with 5-6 of your red layers.
Make a stencil with a scrap piece of paper. You want to make a blue ring of cake to go on the outside of the cake for the blue part of the flag. You want a decent sized rectangle of blue to be showing. Cut out your circle and place it on the blue cake to measure. If it's a good size, trace around the paper with a knife. Do the same with the remaining red layers.
Making sure that your cake has a thick layer of frosting on top, lay one of your smaller red layers on top, and top it with more frosting. Do this with the remaining red layers. 
Cut the blue ring in half so you can easily move it. Place it so that it fits snugly around the red layers. 


Do a crumb coat on the entire cake, and refrigerate for at least 30 minutes. Frost it however you want! I decided to leave mine pretty plain since the inside was so crazy. I didn't want too much going on with it.
If any of you try this cake, I'd LOVE to see it!
 My little helper was all tuckered out!

Monday, April 11, 2011

Easter Eggs

Eggs
Vinegar
Food coloring
Rubber cement
Vegetable oil

Start out by hard boiling your eggs. It's best to NOT use new eggs. Most times when you buy eggs from the store, they haven't been sitting on the shelf long. So make sure they sit in your fridge for about a week or so. If they're too new and you hard boil them, they won't peel very nicely.
Put your eggs in a pot and cover them with 1-2 inches of cool water. Put them on the stove on high.
Once your eggs have come to a boil, turn them off and let them sit for 15-20 minutes (it really doesn't matter too much, I accidentally left mine for about 40 minutes while I showered, and they turned out fine). 
Fish your eggs out of the hot water and place them in a bath of cold water. You might need to switch it out once for more cold water.
Once your eggs have cooled, you need to prep them for dying. 
Take your rubber cement and a paintbrush. 
This is the fun part! Make all sorts of designs on your eggs with the rubber cement. I zig zagged it across the eggs, swirled it, did polka dots, ect. You could even write names! Get your designs done, and give them at least 30 minutes to dry.
You need to use HOT water for your food coloring, so it's best to boil it. Once your water has boiled, mix your water and vinegar. You need 1 tsp of vinegar for every cup. I poured myself 2 cups of hot water, added 2 tsp of vinegar, and then distributed it evenly into my 3 cups. You don't want to fill your cups too full, because they may over flow when you put your eggs in them.
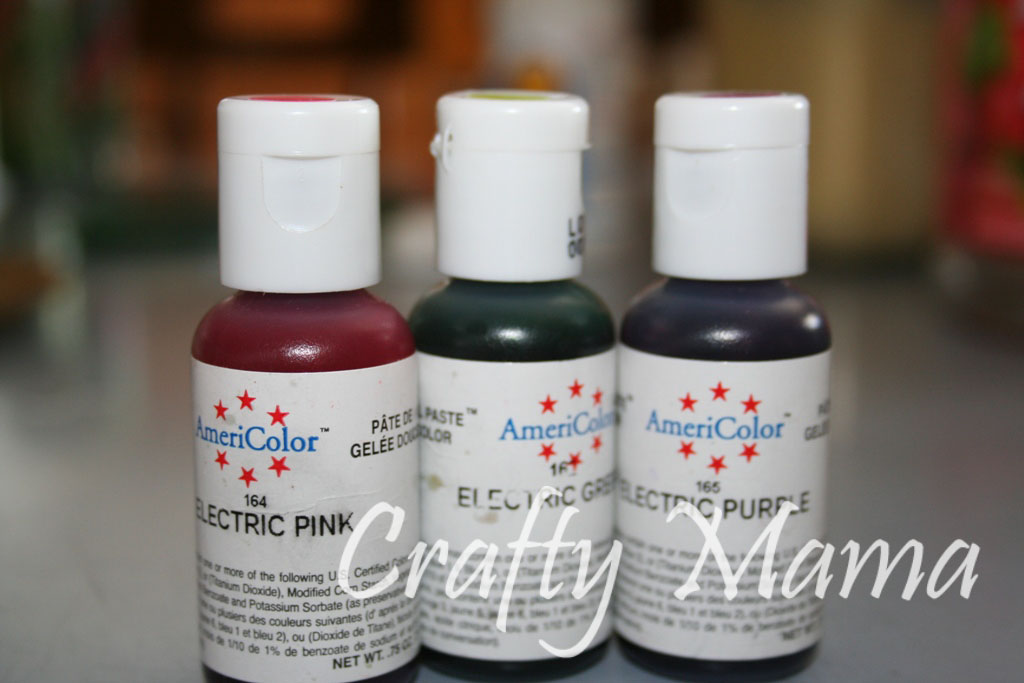
If you don't have the cool little color tablets that come with Easter egg kits, you can use plain food coloring. I used some leftover gel food coloring from Emma's birthday cake, electric pink, green, and purple.
Add enough food coloring to each cup to get a nice rich color. 
Dip your eggs in your colors, checking on them every 10-15 seconds to see what color they are. When they're the color you want, pull them out with a spoon. 
Lay them on your drying rack or paper towel. I used a cookie sheet with a cooling rack on top.
Once your eggs are mostly dry, wipe off the bottoms with a paper towel, and rub off the rubber cement. To get a shiny look to your eggs, rub them with vegetable oil.
To get the marble effect on your eggs, add about a tsp of vegetable oil to your colored water. When you dip your egg in, the vegetable oil will coat parts of the egg, and keep the color off them. The key here is to dip the egg in, and leave it there, don't check on it! I made that mistake with a couple of my first eggs, and they came out barely marbled. Let dry, and wipe clean with a paper towel.
This was such a fun project to do! I loved the effects on the eggs, and they turned out so CUTE! I actually think I'm going to do some more before Easter, maybe trying out some more effects.

Friday, March 11, 2011

Buttercream Frosting


What You'll Need:
3 cups Powdered Sugar
1 cup Salted Butter (2 sticks)
1 tsp Vanilla Extract
Dash of Heavy Whipping Cream (or milk, or half and half)

Start by softening your butter. A tip I learned from school: to soften butter, put it in the microwave for 5 seconds, flip it, and repeat 2-3 times until it is the desired softness. If you don't flip it in between, it will all melt in the center, and you don't want melted butter!
Throw your butter in the mixer with a whisk attachment. You can also use a hand mixer for this if you have one. Set your mixer on low for 30 seconds or so, just to break up the butter. Slowly incorporate the powdered sugar, 1 cup at a time. Once the powdered sugar is incorporated, turn your mixer on a high setting and whip the mixture for about 3 minutes. It should now be light and fluffy.
Scrape down the sides and bottom of your bowl, and add the vanilla. Whip it for another minute. Taste test it for smoothness and flavor, and add a small dash of cream at this point. Whip it another minute and taste it again. 
This is the tastiest, simplest butter cream I've tried so far. It's light and fluffy and oh-so good. It's also great for decorating cakes (which is what I made it for!) I love passing along a good recipe when I find one because there's so many bad ones out there, it's hard to weed them out if you haven't tried them before.

Unfortunately, all I was able to do was taste test the frosting. We just discovered that Charlie has a milk protein allergy, and if I eat dairy, he screams. All day. Every day. It's amazing how much time can be used up holding a crying baby! I'm happy we figured out what was going on though, and he's much happier now. I'm only on day 5 of my dairy free diet, but he's already doing so much better. 
Charlie was a trooper while I made my frosting.
Snoozing in the Sleepy Wrap.
And Emma? She was good, too. And yes, she was rewarded for her good behavior, she got to lick the spoon! :)

Sunday, January 2, 2011

Christmas Goodies

I tried out a couple of the recipes I featured a few weeks back. I'm glad I did a test run, I ended up fiddling with the recipes just a bit. I didn't use as high quality of a chocolate as I should have for the hot chocolate on a stick, and that probably contributed to it a little, but they ended up turning out pretty good once I figured out what worked! I made the hot chocolate on a stick, some Ande's Mints, and homemade marshmallows (I didn't get pictures of the marshmallows). For the hot chocolate on a stick, I ended up just melting chocolate, letting it set part way, and sticking the candy canes in. I had a hard time getting them out of the molds (the original recipe came out fine, my final recipe, not so much), so I melted them back down a little to get them out, and rolled them in cocoa powder. They looked pretty cute in the end. Everything turned out great, and my family seemed to love their little goodie bags!

Saturday, December 18, 2010

Elegant Centerpiece

Just wanted to show off some pictures of our super simple centerpiece for Christmas! Some fresh cranberries and floating candles in water, and evergreen branches. Doesn't get any simpler than that, but it's so elegant and festive!

Friday, December 17, 2010

Caramel Apple Pie and fool proof crust

The original recipe I started out with came from Food Network. I deviated from the recipe the first time, and wasn't very happy with the results, so I tweeked it a bit this time, and it was SO tasty. I had to make TWO! (One to eat, one to give, of course). Unfortunately, I don't have an exact recipe, because I hate measuring! I basically just added a little of this and a little of that, but I'll try my best to duplicate it!

What You'll Need:
Pie Crust:
2 cups flour
1 cup Crisco
1/2 cup cold water
Pinch of salt

Pie filling:
2 lbs. apples (I used a mix of Gala and Granny Smith)
2 Tbsp flour
1/4 cup sugar
1/2-1 tbsp cinnamon (depending on how strong you like it)
1/4-1/2 cup of caramel (I used Hershey's caramel)

Egg wash:
1 egg, beaten
Splash of milk
Sugar for sprinkling

Preheat your oven to 350 degrees. 
Peel and slice your apples. Throw them in a bowl with cold water and a splash of lemon juice to keep them from browning. (If you don't have lemon juice, you can use 7 Up).
The crust recipe is my mom's "fool proof" crust recipe that she had given to her from a relative. I actually butchered it horribly the first time I made it. Like i said, I hate measuring! With this recipe, it will ALWAYS turn out as long as you measure precisely! I haven't had a problem with it since I gave in to my measuring cups.
Level off your scoops of flour with the back of a knife, and pack down your Crisco into the measuring cup. 
Combine the flour, salt and Crisco using a pastry cutter or a fork. 
When it’s well combined (a kind of mealy consistency), add the water.
Mix together until it forms a dough; try not to over mix. I used my hands for the last little bit of mixing.
Split your dough into 2 pieces to roll out. Flour your table, and start rolling out your dough. When it’s about 8 inches wide, pick it up, throw some more flour under it, and flip it over to finish rolling out.  I never have it get stuck to the counter when I do this. 
Roll out your first half of the dough and put it in your pie dish. It helps to throw it over your rolling pin to keep it from tearing. 
Trim off the edges with a knife.
Drain your apples. Add the remaining ingredients to the apples and mix. Throw your pie filling into your pie shell, and roll out the other half of the dough. 
Add the top of the crust, and pinch off the edges to seal in the pie filling. Poke some decorative holes in it to let the steam vent out.
Put your pie in a 350 degree oven, and set the timer for 30 minutes.
To make your egg wash, beat your egg and add a splash of milk. Take your pie out of the oven when the timer goes off. Paint the top of your pie with the egg wash, and sprinkle with sugar. Put the pie back in the oven for another 30 minutes.
After 30 minutes, take your pie out and test the apples. Stick a knife or tooth pick into the apples in various places to see if they're tender. If they don't give way to the knife, put the pie in for another 10 minutes or so. If the top is already pretty brown, cover the top of the pie with foil to keep it from browning too much.
I was seriously impressed with this pie. It must be the BEST pie I have made so far. The crust turned out so flaky and perfectly browned! With the egg wash and sugar, it makes a crisp crust on top, almost like it's caramelized. It was DELISH!