Monday, August 30, 2010

Iced Mocha: This is how I like to start my mornings.. :)

Since obtaining access to an espresso maker, I've learned to make a few different kinds of coffee drinks. I'm not much of a straight coffee drinker, but I LOVE mocha's, lattes, and cappuccinos. Here's a quick "how to" for my favorite drink.
Caramel Iced Mocha
What you'll need:
Espresso or coffee
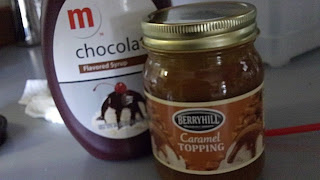
Caramel ice cream topping
Chocolate syrup
Ice cubes
Milk
Whipped cream
A large cup (I used an old Tim Horton's iced coffee cup)
Prepare your coffee or espresso according to the directions on your machine. I like to use a caramel roast coffee bean for mine. Pour the espresso in your cup, and mix in your caramel and chocolate syrup. 
You want to do this while it's still warm so that it dissolves easily. Add your ice, about 5-7 pieces. 
Pour milk in on top of it until it just covers the ice. Use a spoon to stir it all together. Add whipped cream, and drizzle with either caramel or chocolate syrup. MMMMM!

For a Frappachino:
Freeze milk in an ice cube tray. (We usually use whole milk and freeze it because Emma can never drink a whole gallon before it expires.)
Chill your espresso in the freezer for 10 minutes.
Throw your espresso, caramel, chocolate syrup, and milk cubes in the blender. 
Blend together. Pour it in your cup and add the whipped cream and drizzle your syrup.

Basil and tomatoes


So what do you do when you have an over-abundance of tomatoes and basil? Italian cooking! In our garden we had a ton of tomatoes that were ripening, and a ton more that were already ripe. And of course TONS of basil, too. I've got two AMAZING recipes I wanted to make.

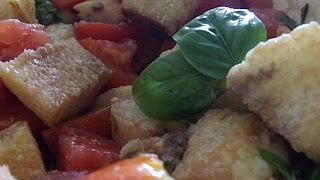
Bread and Tomato Salad

What you'll need:
Crusty bread (I used 2 crusty baguettes) You can also use a large loaf of crusty bread.
5 medium Vine ripe tomatoes (make sure they're fresh. If you buy them from the store, make sure the vine is still fresh and green)
One bunch of fresh basil
Olive Oil
Balsamic Vinegar
Garlic Salt

This is my version of Rachel Ray's Bread and Tomato Salad. I saw it on her show a few years ago, and the recipe has transformed over the years to be what it is now. It's one of my favorites! :)
You'll want to start with your baguettes. 
Pick a LARGE bowl for this salad, you'll need it. Cut up your baguette into large bite size pieces. I like my salad to have pretty big chunks in it so it doesn't all turn to mush. If I'm using a baguette like I am this time, I slice it in 3/4 inch slices, and then cut those in half.

Slice your tomatoes into large bite size pieces. I make mine slightly smaller than the bread.

Give the basil a rough chop and throw it into the bowl. Now drizzle it with your olive oil, balsamic vinegar, and garlic salt. I don't have any exact measurements for this part, I just do enough to coat it. I usually drizzle a little of each, toss it a couple times, and repeat that a couple more times. 
Taste test it to make sure you've got a good balance of oil, vinegar and garlic. And you're done! This dish tastes best if left in the fridge for 2 or more hours. Enjoy. :)

Tomato Basil Pasta

What you'll need:
Angel hair pasta
Olive oil
Balsamic vinegar
Minced roasted garlic (it comes in a jar in the produce section, make sure you get the roasted and not the raw, since you won't be cooking the garlic).
Salt
Basil
Tomatoes
Fresh grated Parmasan cheese

Once your water starts boiling, add your pasta and a pinch of salt. I usually add a couple drops of olive oil to the water to keep the pasta from sticking to itself.
Angel hair pasta only needs to cook a few minutes, about 5. Taste test a strand to make sure it's the texture you like. 
Drain your pasta. Add enough balsamic vinegar and olive oil to wet the pasta. Add the salt and roasted garlic. Give your basil a rough chop, along with the tomatoes. I like mine to be pretty large pieces. Add the remaining ingredients and taste test to make sure you have enough salt. Enjoy!

Thursday, August 26, 2010

My first diaper cover!

I'm very proud of these diaper covers. They were SO simple to make, and pretty cheap (when you compare to the cost of buying a diaper or cover for $15+, or compare it to disposables). I used my own pattern traced from one of my KatyDid diapers. I modified it to look more like the Chloe's Toes diaper pattern. I'm told that there's a free pattern out there called the Sprout Snap diaper pattern, which is similar to this one. The Chloe's Toes pattern is $16.99, which isn't bad if you plan to make lots of dipes from it.
My first dipe I did with the cheaper fabric I had. I got this cute purple and green skull pattern in the clearance section at Joanne's for only $3 a yard, so I only paid $1.50 for the half yard I got. I should be able to make 3 dipes out of it. I knew it wouldn't turn out too good since it was my first attempt, so I didn't want to waste any precious Minky!
I made the outside out of fleece, the inside is PUL (polyurethane laminate), and it's bound with plain 'ol elastic. I had a little trouble finding the PUL at first, the ladies at Joanne's didn't know what it was. I knew where to find it though, thanks to one of my friends. It's in the utility fabric section. They only had white, which was fine since you only see it on the inside. You're supposed to use FOE (fold-over elastic) around the edge, but they didn't sell it in the store, and I was too impatient to wait for anything to come by mail, so I bought regular 1 inch elastic. I got a kind that was nice and bendy. I ironed it right down the middle lengthwise to make it easier to sew on. It actually worked pretty darn well. It took a little over a yard for each dipe. 
I found a great tutorial to show me how to sew the elastic on. 
The explanations are great, and it made it pretty easy to do. It helped that it's a SUPER easy pattern for a first timer. 
I ended up not stretching the elastic quite enough around the legs, so I had gaps once it was on. I went over it with another piece of elastic (laid right on top of the previously sewed elastic) stretched as tight as it would go. It made the leg of the diaper curl in a weird way when lying flat, but at least it made it a little tighter.
I haven't invested money in snap pliers yet, and I didn't want to use velcro since I read that velcro and FOE are instant enemies (plus it was more expensive than I realized). So I used buttons. I don't think many people would recommend using buttons on a cloth diaper, but like I said, I'm impatient. It's tedious trying to button them, plus they're not baby proof, and I give Emma a week before she figures out how to get this cover off. But it's a cute little addition to the diaper, and it works for now. I'll probably replace them with snaps and sew up the button holes once I invest in snap pliers.
The second diaper I made, I was brave enough to use my zebra fuzzy material. This one turned out much nicer. I made sure to stretch my elastic to the max around the legs and in the back, that way it would be tighter. This worked out a lot better for me, and the diaper fit almost perfectly! I'm very happy with the way it turned out. 
I plan on using these with prefolds. I got a lot of 40 for $5 at a mom to mom sale last weekend (normally $13 for a dozen), plus I still had a dozen leftover from when Emma was newborn. The prefolds tend to be too long, and I have to fold them over, which creates extra bulk in the front or back, so I trimmed mine using this tutorial. I didn't sew on the extra strip I'd cut off, I don't think I need the extra absorbency, and didn't want the extra bulk. Now when she wears them, they're nice and trim and look just SO DANG CUTE! lol My next diaper I'm going to use my pink Minky. The strip I have left is only 11 inches wide, so I plan to make the tabs that wrap around front from the zebra. I have to wait for my FOE to come in the mail though, wish me luck!

Signing Time!


    Emma never ceases to amaze me. Last night I asked her if she wanted to eat, and she signed "eat", which is one she's known for a while. I was digging through the fridge and asked her if she wanted an apple, and she signed "apple"! That's one I've never seen her do! I'm always so amazed at her progress, I can't believe she knows so many signs.
    We got the Signing Time dvds from a friend to borrow when she was about 3 months. I started doing basic signs, just to get in the hang of it, long before she would pick it up. By the time she was probably 5 months, she recognized the sign for milk, that was definitely her favorite. :) By 9 months, she was doing some signs here and there, usually things like "milk" and "more". When she was eating was when we practiced most. She was really interested in her dvds, so we let her watch it just about every day (they're 30 minutes each). Now she's 15 months, and she has a huge vocabulary. I don't even know how many signs she knows, because she picks up so many from the videos, and then uses them when we're least expecting it! Last I knew she was at about 20 that I could recognize that she was using regularly. Her most used signs are eat, more, kitty, dog, all done, love, hungry, dad, drink, and tree. I've caught her doing a number of other signs, but she doesn't do them as often, usually when she's prompted, or when we sign it to her. 
So far for words, she has barely any she can say. "Da" means dad, dog, and Dexter. Other than that she can say mama, dada, pa, ma, and a few other short syllable words. I think it's SO amazing that she can communicate with us so well, even though she can't talk yet. 
    One of the most recent lessons I've learned with signing is, don't avoid doing a sign that you think is too complicated for your child to pick up. They have their own ways of signing, and they'll interpret it how they can. Once you realize what their sign means, you can still use it and understand them. I avoided doing the sign for "water" (make a W with your fingers, and put them to your chin), because I knew Emma didn't have the dexterity to do it. The other day, on a whim, I did the sign to her (this is one of the sings on her video, so she sees it often), and she signed it with one finger! It was close enough. I still do the sign the proper way, so that she doesn't get confused. She knows what the sign looks like, and she does it the best she can. Yesterday I asked if she wanted to go on a walk, and she signed "water". Close enough, I guess they sound similar, lol.
    I'm always recommending singing to other people but most of the other parents I talk to say that their child doesn't have success with it. I think it helps if you incorporate singing into your every day life, and find a good method of teaching. Like any language, if you use it around your children every day, they'll pick it up. (If your child watches Dora the Explorer, you've probably already learned that). The woman who lent me the Signing Time dvds has had tons of success with her grandchildren, and also her day care kids. I think it's because she uses these signs like she would any other language. I had no prior experience with singing until I watched these dvds and learned them. They make it so simple, watching the dvd through once, I knew all the signs that they had on there (about 15). Everyone in my family has gotten really involved with it, too. Grandma loves getting online and finding new signs to teach Emma when we see them. Oma already knows most the signs Emma knows, and watches the dvds with her occasionally to learn more of them.
    There has been some controversy about whether singing delays a child's speech. After discussing my concerns with other parents, I've decided that I don't think Emma would be any farther along with her speech at this point if she wasn't signing. She still attempts to say words; and she usually says "da" when singing dog, or "da" for Dexter while singing "kitty".
    I just wanted to share our experience with other parents out there. We love signing with our daughter, and can't wait to do it with the next baby. It's such a great feeling to tell your daughter you love her, and have her sign "love" right back, long before she could ever tell you in words. :)

http://www.signingtime.com/
I don't suggest going out on a whim and buying a collection of these dvds unless you know you're really going to get into it. They're pretty pricey! You Tube has lots of short clips that will give you a good idea of what to expect from the dvds. You can occasionally find them on Ebay, or borrow them from a friend who's using them.

Monday, August 23, 2010

Freezer Paper Shirt Design

What You'll Need: 
A shirt, or other item of clothing
Freezer paper (I found this somewhat difficult to find. Check a few different grocery stores, it should be in with the Saran Wrap and Foil. I got a large roll for $2.99 at our local Meijer; Walmart didn't have it)
Fabric paint or spray paint (if you only plan to wear this shirt once, you can also use acrylic. I don't suggest putting it through the wash though, it won't look as nice when it comes out).
A paint brush
A palette 
Xacto Knife (I used a box cutter and it worked fine, but I don't suggest scissors)
Iron

Let's get started! Get online and find yourself a design! Or if you're a real artist, draw it yourself. I wanted a ghost for this shirt, it's going to be Emma's Halloween shirt! So I got online, Googled "ghost" and found the perfect picture. I pasted it into Word and made it the actual size I want it on the shirt. I took the proper amount of Freezer Paper, and held it up to the monitor to trace. One side is shiny, the other is like paper, you'll want to draw on the paper side. Once I had my ghost, I added in the word "BOO" underneath. I'm never brave enough to freehand these things, so of course, I typed it into Word using the font I wanted, and traced it.
Now that you have that done, you need to cut it out. Use the Xacto knife and be as precise as you can. 
You may want to keep these little middle parts if you've got any. I happened to be using a black shirt, and I had black paint, so I tossed these out, and I filled in the negative space with the black paint (you'll see that on the finished product). 
Now that you've got your design cut out, it's time to iron it! The iron doesn't need to be very hot, I turned mine on and used it about 15 seconds later. Place the design shiny side down onto the shirt. Make sure it's positioned exactly how you want it. Press the iron on a corner of the design, and then gently tug at the freezer paper to see if it sticks to the shirt. If it doesn't, wait for your iron to heat up a little more, and adjust the heat setting accordingly. When ironing, press the iron down and gently wiggle it back and forth while using gentle pressure. You don't want to move the iron back and forth much, because it could tear or rip back your design.
Now it's time to paint! I chose a nice pearly set of fabric paints, so they have a metallic sheen to them. Once I had my ghost painted, I realized that the paint takes 4 hours to dry, and it was looking like I might need a second coat. You can use a hair dryer to speed up the process, but I chose to just be done with it (hair dryers + sleeping babies don't mix well). I got the paint as thick as I dared, and used my sponge brush to get a nice flat layer. It does this better than the brush, and won't leave streaks. 
Once my ghost and letters were filled in, I used my plain black (non metallic) and a paint brush to draw on the eyes, mouth, and middle of the letters. 
Leave it to dry flat for at least 4 hours, or overnight. You don't want to do the next step until it's 100% dry. Once it's completely dry, peel off your freezer paper. I had a little bit of a problem with mine sticking, so you may need to peel off little bits of paper that get stuck to the edges of the paint.
How cute is that?

You can also do this inverted. I made Ben a shirt this way. We're both a fan of Failblog.org, and I thought this would be a funny idea for a shirt. I considered spelling "FAIL" wrong, to make it a true fail, but I wasn't sure people would get it, lol. I cut out my letters (you can use scissors for this, since you don't need the outer parts of the freezer paper, just the letters themselves).  Iron them on, just like last time. Since I was spray painting this time, I needed my fabric to be really flat. After ironing, I pinned my shirt to a strip of cardboard to hold it in place. This will also prevent bleeding through. 

I went outside to use my spray paint. I was planning to use silver, but it mysteriously disappeared, so I used black instead. 
Leave it outside to dry to the touch (about 30 minutes) and then peel off the letters. You may want to let it dry for a few hours before washing it.

Autumn Spice Caramel Dip


What you'll need:
1/2 cup (4 oz, or 1 stick) Butter
1 1/2 cups Brown Sugar
14 oz. Sweetened Condensed Milk
3/4 cup Corn Syrup
1 tsp. Vanilla
1/2 tsp. Cinnamon
1/2 cup Peanut Butter or Chocolate chips (optional)
Start by melting your butter in a pan on low. 
Once it's completely melted, add in your sugar, syrup, and milk. 
Turn heat to medium and stir continuously. 
Once your caramel comes to a boil, remove it from the heat.
Add your remaining ingredients.
Wait until it's cooled to try it! Caramel is VERY hot.

I love this dip with apples, it's perfect for fall! If you're not planning on gifting this caramel, or using it for a party, I suggest only making half batch, it's a LOT of caramel. 

Half Batch:
1/4 cup (2 oz, 1/2 stick) butter
3/4 cups Brown Sugar
7 oz. Sweetened Condensed Milk
3/8 cup Corn Syrup
1/2 tsp Vanilla
1/4 tsp. Cinnamin
1/4 Peanut Butter or Chocolate Chips (optional)

I chose to make a full batch and gift it! I took some baby food jars and peeled the wrappers off. Once the caramel had cooled a little (don't wait until it's chilled, you won't be able to pour it) use a funnel to pour it into the jars. 
Take a 4 in. by 4 in. square of cute fabric (I would have used something more fall-ish, but this is what I had in the house), and iron it to make it look nice and crisp. I didn't worry too much about the strings on the edges, I think it makes it look cute and rustic.
Fit it to the top of the jar, hold it in place, and tie your ribbon around it. I used about 12 inches of ribbon for this.
Enjoy!

Tufted Tray

This next project I saw on another blog. Here's the link. A Place For Us: Tufted Serving Tray
Since I did mine a bit different, I want to share it!
Tufted Tray

Supplies needed: 
Tray
Cardboard
Cotton stuffing
Enough fabric to stretch over the padded cardboard and wrap around back
A sturdy needle with thread
Hot glue gun
Beads or rhinestones (optional)
Ribbon (optional)

I found this cute little tray at a garage sale for $1. Since I'd seen the tutorial I just KNEW what I was going to do with it right away.
The wood was in pretty good shape, and it was a good color, so I decided not to paint it. I hope to find another one of these cute trays, I'm thinking a white tray with a zebra pad, and maybe pink ribbon? CUTE!

Alright, so you take your cardboard and cut it to fit inside the tray. You want it just slightly smaller so it'll fit once it's covered.
Lay your cotton stuffing on top of the cardboard and get it as smooth as you can. You don't want bulges in weird places. You shouldn't need much cotton for this. If you want a more dramatic affect, use more cotton.
Take your fabric and stretch it across the cardboard. Pull it tight on the back and hot glue it there. Do the same with the ends. You'll want to wrap it like a gift. Make sure the back is well secured with hot glue.
Note: Both Joannes and Walmart sell fabric squares that are about 20 in. by 20 in. If you don't want to spend the money for fabric on the bolt, it's perfect for this project.
Take your needle and thread it. I chose not to use the ribbon and beads, mainly because I didn't have any really cute ribbon or a really large needle on hand. Mark out the spots where you want to sew. I did 5 spots. Starting in the back, sew back and forth at least 4-5 times. This will pull the fabric tight in the front and create the tufted appearance. Snip the thread in the back. (If you plan to use ribbon and beads, check the tutorial listed at the top for instructions).
Once you have all of your threading done, you can glue on the rhinestones. I used the smallest size I had. 
Fit it into the tray, and look at how cute it is!

Sunday, August 22, 2010

SWAP: Baby Blanket

Alright, my first tutorial! You'll find that most (okay, all) of my sewing is without patterns (SWAP). These will probably be the most POINTLESS tutorials you'll find on my blog; some of them will be helpful, some not so much. I'm still very new at sewing, but I find that it's easier just to "wing it" than to go searching for a pattern for something when I know what it looks like in my head. I'll try my best to include instructions for cutting out your fabric to be the proper size. In the case of the dresses I've sewn for Emma, I don't know if I'd find a pattern identical to what I want. Lucky for you, only a portion of my tutorials will be on sewing. Today's tutorial should be spot on though, there's not a whole lot of measuring, and there's no need for a pattern.

DIY: Zebra and Pink Dotted Minky Baby Blanket
I started off with 2 fabrics. I had some pink dotted minky leftover from a pillowcase I made for Emma, and wanted to use up the scraps. It was about 2ft by 2 ft. I bought some soft zebra fabric to go on the other side.
 
Meaure your fabric to be the size you want. I made my 2 ft by 2 ft because that's what the scraps I had were. Any size should work just fine though. Since this blanket is for my 15 month old daughter, 2x2 is a perfect size!
Pin your fabric together inside out. You'll be sewing it this way, and turning it right side in before you're finished. You want to leave enough room so you don't hit the pins with the sewing needle. I put mine about 3/4 of an inch in from the edge of the fabric. 
Sew 3 of the 4 sides of the fabric together. I used one of the tighter stitches my machine has to offer. 
 
When you get to the 4th side, stop sewing when you're about 6-8 inches from where you started. You need to leave room to turn it. Once you've finished sewing that much, remove all the pins and turn it right side in.
Now that the blanket is turned right side in, you should have a gap in it. Fold the hem in to sew. You might want to pin it if it doesn't want to stay put. You should overlap your sewing a little so you don't end up with a gap in it, like mine did, woops!
Here's the finished product!